We use cookies to make your experience better. To comply with the new e-Privacy directive, we need to ask for your consent to set the cookies. Learn more.
IS BEDDING BRAKE PADS NECESSARY?

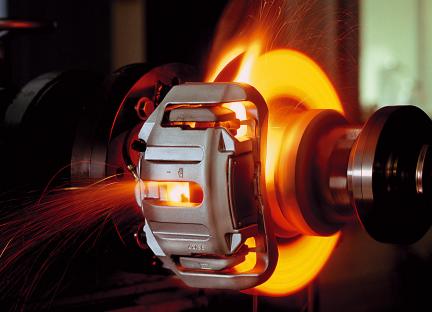
For most folks, the gradual wearing-in of your brake pads and discs will be performed through natural driving, but if you want your pads to perform great right out of the gate, and minimize potential issues, doing a procedure known as “bedding in” is extremely helpful. It’s also a good way to safely stress-test your braking system to be sure everything is working properly, and even more important, it helps you understand exactly how your brakes do their job.
The first thing to understand is what actually is happening with a fresh set of pads and discs. If you look at the friction surface on a used disc, you’ll notice a shiny, smooth grey-blue “glaze” that is on the surface. This material is actually known as “pad transfer”. It’s actually brake pad material that through the high temperature, high friction process has been deposited on the disc. A brake pad pressing against bare metal actually doesn’t stop well. But, a brake pad pressing up against brake pad material, with steel underneath stops! But, when you first change your pads and disc, you have none of this pad transfer material on your rotors, and laying down a good foundation for future material is what the bedding-in procedure does.
WHY SHOULD YOU BED BRAKE PADS?
Many times, if pads are run too hard, too fast, the pad surface can heavily transfer (think literally melt) onto the disc when the car is parked, which causes an uneven area of pad material deposited on the brake disc. Once you drive again, new pad material is then deposited on top of and around this extra deposit, creating an un-even surface on the disc. In a majority of cases, this very phenomenon is what is actually diagnosed as a “warped disc” when newly installed pads and discs quickly develop a pulsation. There’s a good chance this problem could have been avoided with the proper bedding-in procedure wasn’t done properly!
It’s important to understand that this procedure should be performed on a safe road, away from traffic – as it’s a good way to test the system of new brake components for any other faults: You will be stopping frequently, so pick a good, flat road where you are able to achieve speed of 45-50 MPH, and be able to stop quickly, away from cars. The break bedding in procedure is a process of quickly heating and cooling the brakes in a repeated fashion, and while doing so it deposits a layer of pad material on the disc surface. Temperature needs to be slowly heated to max use, which will create a smooth, even pad transfer. To do this, follow the following steps.
HOW TO BED BRAKES
1. PICK YOUR SPOT
Find an open stretch of road that will allow you to safely stop your vehicle multiple times.
2. SPEED UP, THEN SLOW DOWN
Accelerate to 35 MPH and apply moderate brake pressure to reduce your speed to under 5 MPH.
3. REPEAT AS NECESSARY
Repeat this process 2-3 times, accelerating back to 35 MPH and moderately braking.
4. TEST AGAIN AT 55 MPH
Next, increase speed to 50 MPH and strongly brake down to 5 MPH. You don’t want to brake strong enough to activate your ABS or lock up the tires. You should be able to come down to 5 MPH within a few seconds.
5. REPEAT AS NECESSARY
Repeat this process 4-5 times, then drive an additional 1-2 miles while very lightly braking to cool down the brakes.
6. PRO TIP:
It’s important to avoid coming to a complete stop during the hard-braking stage as it’s possible to melt brake pads against hot rotors. Of course, should a deer, pedestrian, or Nessie got our of the lake and run onto the road, feel free to mash the brake pedal. Safety first!
Your stop-and-go session is now complete. Park the car and allow the brakes to fully cool for an hour. For best results, avoid pressing down on the brake pedal when parked and take a route home with minimal stop lights while the brakes are cooling.
While bedding in your brakes can sound like a sensitive procedure, one funky stop isn’t going to ruin your efforts. There’s no need to stress out, just drive safely and avoid emergency stops when possible.
The important thing here is once you’ve completed the procedure, be sure to go easy on the brake as you return the car back home for cooling. The idea is to heat the brakes up through the cycles listed above, and then let them cool easily on the ride home, and while the car is parked. Once done, your brakes have been bedded in, and a good foundation has been put down!
AVOIDING BRAKE JUDDER
Brake judder is caused by an uneven buildup of pad material on the friction surface of the disc. This can occur with improper or incomplete bed-in, or when changing between incompatible pad materials on the same disc. During bed-in some judder can occur for the first 5 to 10 laps or until the discs and pads are sufficiently warmed and can vary from a barely noticeable vibration to a violent shake.
Uneven pad transfer can also be caused by Imprinting, which is staying too long on the pedal when the car is standing still, but the brakes are hot. Small particles of the friction material can bond into the disc surface, or potentially pull the transferred layer out of the disc surface.


